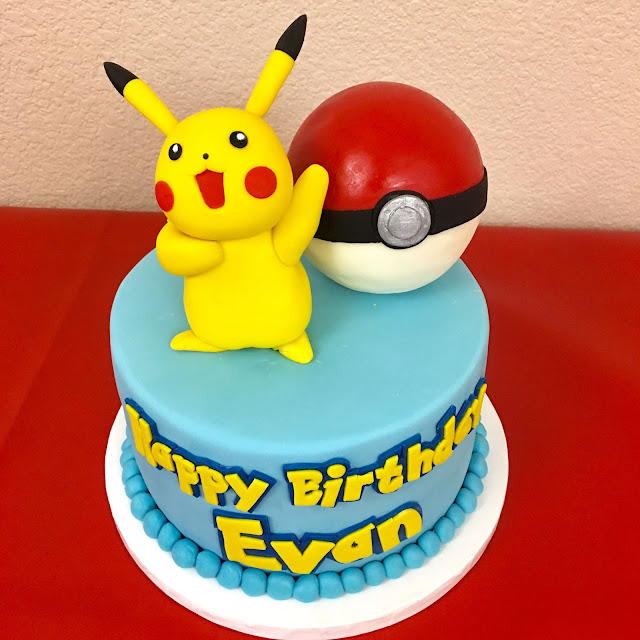
Pokemon Cake Topper!
The Pokemon Pikachu cake topper is a popular one and this blog post is a quick tutorial of how I make him.
There are few ingredients and the steps are simple, however, make sure to make him at least one or preferably two days in advance to allow enough time to dry.
Let's get started!:-D
Required materials:
- Cake Couture Fondant in yellow, red, black and white (or other fondant of your choice preferably marshmallow fondant)
- Gum Tragacanth - or other gum of your choice, however I prefer gum tragacanth because of it's natural properties and slower setting time (allows for more natural look and is forgiving when modeling), coming to our online shop soon!
- Toothpicks for the ears
- Small sharp knife
- 1A cake tip
- Weight scale
- Flower drying cups or foam
- Skewer for entire figure and cutter for your skewer
- Shortening
- Sugar glue (make by mixing 1/4 tsp of tylose, 1/4 tsp of sugar & 2 tbsp of very hot water - set aside for 15 minutes)
Steps:
Step 1.
Weight (or estimate pikachu body size) your yellow fondant and mix with a small amount of gum tragacanth (like two pinches). Here you can see that I used 5 oz. for the body and 4 oz. for the head.
Step 2.
Roll each piece with sufficient pressure to remove creases and mix in gum. For the body, create a flattened avocado shape. Use your skewer or a thin paintbrush to mark the bottom of the body into separate "legs". For the head, roll your fondant into a ball, flatten slightly and make the top width slightly thinner than the bottom width. Place both pieces in a flower cup or foam piece for drying. See a pic of the head and body below.
Step 3.
Roll a couple of small yellow ears, insert with each with a toothpick and complete with a cone shaped black ear tip. Secure the black tip with a dab of sugar glue or water. Set aside with the body and head to dry.
Step 4.
When the head feels firm (maybe 1+ hours or even later in the day) cut scallop shapes with a 1A tip on each side of a central point for a face smile. With your small sharp knife trace a mouth shape and cut out with good depth. Use a very thin amount of red fondant in a similar mouth shape and fill in. Use the same tip to cut red cheek circles. Use a small amount of black (and smaller round tip) to make the eyes and a tiny tiny piece for the nose. Add a tiny piece of white for the eye highlight.
Step 5.
After about 24 hours, create flat triangular feet and mark 2 lines (for 3 toes). Cut the top edge of the body, insert two toothpicks into the body and use to position the head. Insert and position the ears. Now that you have the body, head and ears all together you can make the arms. I measured out 14 grams here (sorry for the change in metrics here! Grams gives a finer measurement and these arms were small). Shape the arms almost like a chunky banana lol. Cut 4 short lines for the 5 fingers. Attach the arms with sugar glue and let dry. For the extended arm use a toothpick for stronger hold.
Step 6.
Stick a skewer through the entire length of Pikachu and into his head for a very secure hold and position into the cake. Use the sharp end to pierce through the figure and once you create the tunnel hole, flip the skewer and cut to size to allow the skewer the right length to pierce the cake board and secure through the figure head. You can see below that it makes cake handling very easy!:-D
And that is it for the Pokemon Pikachu figure!
Here are some other behind the scenes pictures!
Drop us a comment and let us know how you liked this post or what other things you might want to see!?
Happy cake making!
Christie


Thanks for the tutorial Christie! Could you tell me how tall will Pikachu be?
ReplyDelete