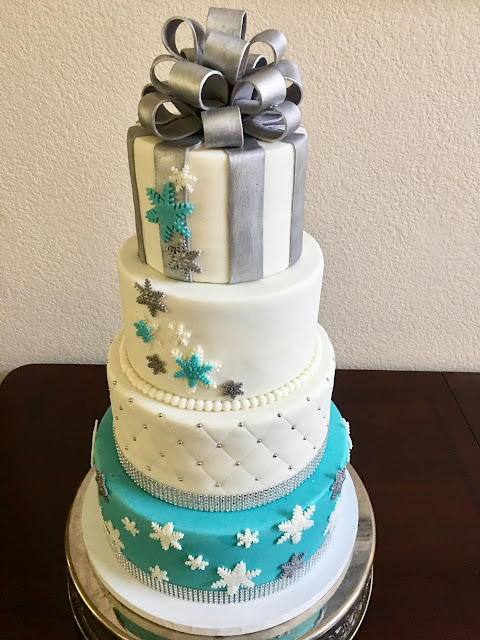
Perfect fondant bow - Winter Wonderland Cake
One of my favorite cake decorating toppers has always been the pretty present bow. After years of research and practice I think I finally got the bow thing figured out!:-D.
This tutorial gives you all the steps it takes to get this perky bow look! Note, make sure to start the bow about 1-2 days in advance minimum in order to allow for enough drying time.
Materials
Required materials
- Cake Couture Fondant in desired bow color or another fondant you like
- Gum Tragacanth or another gum you prefer (gum tragacanth coming to our shop soon!)
- Sugar glue (make by mixing 1/4 tsp of tylose, 1/4 tsp of sugar & 2 tbsp of very hot water - set aside for 15 minutes)
- Water and water brush
- Fondant roller
- Ruler (with desired bow width)
Not required but these do help:
- Pasta roller mixer attachment for an even strip width
- Luster dust for bow color
- Pizza cutter, rotary cutter or knife
Steps
Step 1.
Mix about 1 cup of fondant with your gum. Then roll out the fondant with a fondant roller and/or pasta roller mixer attachment. I like to start with the fondant roller and finish with the pasta roller attachment at the #1 setting. Then smooth it with your fondant smoother if you like.
Step 2.
Lay out your flattened fondant piece and using the width of your ruler and cutter (I love to use my KitchenAid pizza cutter!) cut out your individual strips about 4-5"long. This may depend on the size of bow you are going for, however do make about 2/3 larger and about 1/3 smaller in general to make it easier to put the bow together.

Step 3.
Dab a small amount of water on the edge of each strip before putting the ends together and pinching/folding in half. Lay all bow loop pieces on one side and set aside to dry. Make sure to position them well so one side isn't getting crushed. I actually like to flip them after about an hour and re-straighten. This will keep them from drying with a crushed look giving them a very neat look. Let bow loops dry overnight or for about 6-8 hours (tip, cold dry air helps)
Step 4.
After the bow loops have dried, trim the edges to make the fitting easier for arranging. Also, to make positioning easier, cut out two 1.5-2" thick disks and use each to arrange and position each row of bow loops. In this picture I used a 2"disc at the very bottom and 6 bow loops on top of it for the very first row. Use your sugar glue to secure loops to disc. Let the first row dry for a few hours. Follow with the second row of 6 bow loops and more sugar glue. Again let dry 6+ hours and top with 5 bow loops.
Step 5. Optional
Using luster dust paint your bow your desired color. In this case I used an edible Imperial Silver.
And that puts a bow on our cake bow topper!
Here are some more behind the scene pictures!
Drop us a comment and let us know how you liked this post or what other things you might want to see!?
Have a great cake day!
Christie


Comments
Post a Comment