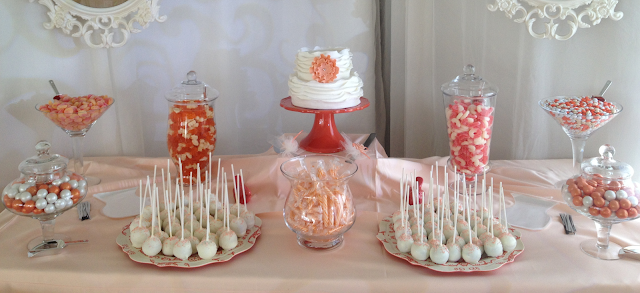
Quick and Easy Cake Pops
So I have realized there are several cake-decorating topics that I have not covered...and cake pops is one of them!!!
Although my work has been mostly in cakes there were occasions I was asked to make cake pops. I will most definitely not claim to be a cake pop expert. This is a basic and quick tutorial for the pop making lover who just wants to make a better cake pop than their first:).
Materials
Your Cake
Chocolate Melts
Cake Pop sticks
NOTE on melts: I have had good luck with Wilton white or Hobby Lobby colored melts. I have not had much luck AT ALL with colored Wilton or other brand colored chocolate. I know pro's use other brands with some special consistency additives, however, this again is the quick and easy version:)
Disclosure: Despite scouring my cake pictures for some behind the scenes images I unfortunately don't have any...just finished cake pop pic:).
Step 1.
Make your cake about 3 to 4 days in advance. After your cake has cooled, wrap it in plastic wrap or in a Tupperware and freeze. I recommend not breaking up the cake at all at this point but if must that is not a big deal.
Step 2.
Bring out your cake from the freezer. While it is still cold cut the edges and the top. These rough sides will interfere with a nice workable consistency. Cover and set the cake aside and let it come to room temperature. I repeat...cover the bowl! As the cake is coming to room temperature, condensation will set in due to the thawing process, if left uncovered the cake would dry out. If I remember correctly bringing the cake to room temperature (or at least somewhere near that to make it workable) takes about 2-3 hours...or maybe less? Let me know if you try it I can't remember I'm sorry!
Step 3.
Once the cake has reached room temperature add a small amount of icing...maybe one tablespoon at a time. Since the cake has extra moisture due to thawing you don't need as much icing as you might otherwise have used (e.g. if you didn't freeze the cake). Mash everything together with your hands and get it to the consistency you like.
Step 4.
Roll one-ounce balls of cake in your hands to create cake balls and place on a tray. I did start using a scale for this because if you go too big it gets too heavy. The Teddy Bear cake pops here were actually about 2 ounces and they were SO heavy that I lost A LOT of them to weight as I was making them. These are the ones that survived:).
Step 5.
Set your tray in the fridge for about 10-30 minutes. No need to cover. Be careful not to make it too cold because if the cake is too cold and your chocolate too warm, you will get cracking in the chocolate.
Step 6.
While the cake balls are in the fridge melt your chocolates in an wide-ish 8 ounce glass cup. Don't use one that is super tall and don't use a bowl, these are more difficult to work with. The best fit are short-ish 8 ounce glass cups. Fill the cup to the top with chocolate and microwave as such: 1 min, stir, 1 min, stir, 30 sec, stir, 30 sec, stir, 20 sec, stir, etc. You might have to alter your routine to your microwave, weather, and chocolate response. Just make sure to heat slowly and stir to keep the heat distributed well. This chocolate can be delicate and can easily hit an unworkable state. I believe there is a chocolate melter that makes this easier at Michaels or on Amazon I'm sure. I've never used it but I have heard it works great!:)
Step 7.
Bring out your cake balls and using a stick poke all of them at the top. Then take a stick, dip it in the chocolate and position it in a cake ball. Repeat for all cake balls.
Step 8.
By the time you finish putting sticks into all of the cake balls you can try dipping them. HOWEVER, if they are too soft this would compromise their strength when dipping, so pop them back in the fridge for about 10 minutes or so if you must. Don't go too long in the fridge or your pop will get cold enough to cause cracking. You might have to experiment to find the sweet spot of coldness here:).
Step 9.
To Dip:
When dipping hold the pop completely vertical and put the entire pop directly in the cup. Once inside the chocolate, rotate the pop and/or the cup around to get full coverage. Make sure to get the chocolate to cover the seam where the stick inserts.
Pull the pop out and hold up letting the chocolate settle. If you want your cake balls to sit on a plate make sure to place them on a wax paper-covered tray to set. Otherwise place them in a cake pop holder or styrofoam for standing pops.
To add sprinkles or anything you want to stick to the chocolate make sure to add that while the chocolate is still wet.
Step 10.
Decorate. I liked adding fondant accents to pops and you can also decorate with cute wrappers and/or ribbon. The A's pops above used royal icing and those sure were tricky!
That's it, 10 steps!!
Good luck!!!


Comments
Post a Comment