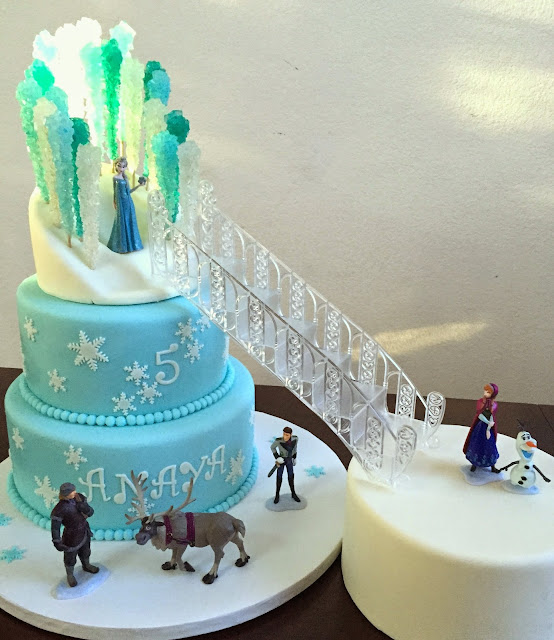
Frozen Ice Castle Cake!
Will we every get enough of Frozen?! Party planning and cake making sure gets fun with this ever-popular girls theme! During the past couple of weeks I think we had a total of 5 Frozen themed cakes. And of course, when it was my little girl's birthday, I just had to give them a Frozen party:)!
For this cake no need to grow your own sugar crystals. I found these at a local candy shop (had to go to two different shops to get the right colors). Then I designed a Styrofoam base to give the crystals the castle-height look. While it may look overwhelming, these were simple elements to put together although it does take some patience;).
Here is a quick tutorial and behind the scenes pix of this cake! Also here is the cliffnote YouTube video:
Materials
* Rock candy in light blue, white, and teal (or any other combo you like!:)) --I found the teal and whiteat Party City and the light blue at a candy store in Old Sacramento
* Wire cutters plires
* 6" foam cake tier (for the castle base)
* 8" (or 6") foam fondant covered cake tier for stair support
* Shortening
* Plastic cake stairs (this one doesn't look the same but it is the one I ordered and I got the one pictured on the final Frozen cake)
* Marshmallow Fondant
* Snowflake cutters
* Tap It Letter Cutters
* Wilton pearl mold
* An 8" and 10" finished fondant-covered two tier cake on an over-sized board (14")
* An 8" extra fondant-covered tier (in Styrofoam or cake)
* Disney Frozen figurine set
Step
Step 1. Cut your 6" foam cake tier to shape using an exacto knife. To get the elevated height look ensure to cut the foam tier very low on one side and not at all on the other side. This will essentially be a snow-looking support base for the rock candy. Cover your finished foam base with vegetable shortening and follow by covering it with white fondant. Do this as well with your stair support foam tier. Let this dry for 6-8 hours.
Step 2. Roll the fondant to a thickness of setting 2 using a KitchenAid pasta roller. Let the fondant firm for about 10-15 minutes (even longer is fine while you are working elsewhere--the extra firmness is great for these detailed cut-outs). Cut out your letters, numbers, and snowflakes.
Step 3. Apply a little bit of water along the base of each cake tier using a small brush and mold, cut, and arrange the pearl border.
Step 4. Arrange your rock candy on the fondant covered support tier. Apply your support structure like you normally would for a top tier (but this one is for the castle tier). Place castle tier on top.
Step 5. For the stairs I cut the pointy tips off using a small sharp knife that I heated with the stove top. I guess I didn't really have too but I preferred them not to poke into the cake. If you want to do this use a knife you are ok with ruining:) and be very careful when heating your blade and cutting your plastic!
Step 6. Arrange your figurines along the board support tier, and of course Else at the castle:).
That is it!
Leave us your questions/comments below and have a great cake day!


I can't order those stairs because I'm in Canada, do you know if I can order them everywhere else?
ReplyDeleteI also can’t find the ladder, may I buy one from you please?
ReplyDeleteI'm not selling the stairs just yet, but I will work on getting some in stock! When I made these years back I had found it in a local cake decorating shop
ReplyDelete