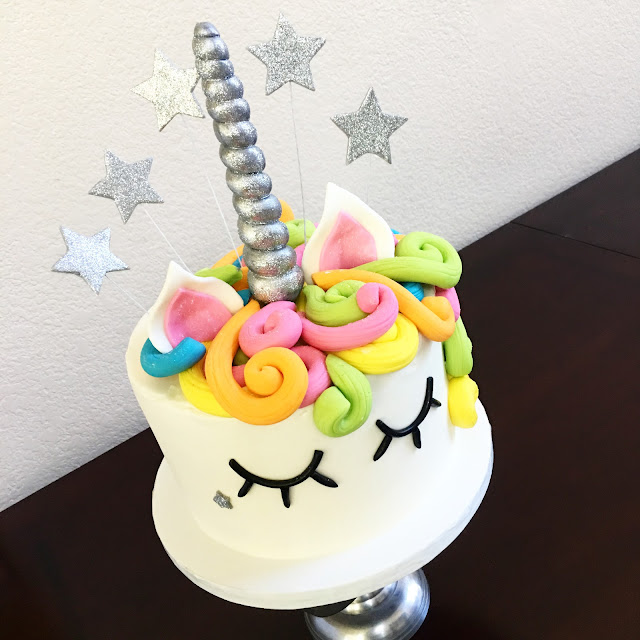
Magical Rainbow Unicorn Cake
Hello and welcome to our **magical** unicorn cake post!!
Today I wanted to share how you can decorate this super FUN cake!!
This is an 8" 4 layer round cake frosted in buttercream and decorated with some colorful and *fun* fondant details. Like you may be able to tell, I LOVE fondant :-D
Here are the key materials I used:
- 8" cake frosted in buttercream
- Fondant! I am partial to our fondant, however LMF or marshmallow fondant also works super well:)
- Paper covered wire in white (coming to our shop soon!)
- Cake colors pink, orange, yellow, green, blue and black and gray
- Sugar glue (one tablespoon of hot water to 1/4 tsp of sugar and 1/4 tsp of CMC poweder)
- Star and round cutters (coming to our shop soon!)
- Non-toxic glitter (also coming to our shop soon:)!)
- 2 skewers, one for the horn and another to mark the unicorn hair
- CMC powder
And now for the steps!
Step 1. I like to work with the gray fondant first to give it enough time to dry and firm up. Mix a little bit of CMC powder into your gray fondant and roll out a thin even piece to cut out your stars.
Step 2. Using your gray fondant with CMC powder, roll out a rope of fondant with one end being thinner than the other. Using a skewer and sugar glue, wrap, twist and secure your unicorn horn together. To check out these unicorn horn steps with more pictures, check out the details here.
Step 3. Now for those pretty little eye lashes! Roll a very think rope of black fondant. With a sharp knife cut two pieces about 1.5" long and 3 pieces about 0.5" long. No need to be super accurate, I just eyeballed the eyelashes (no pun intended lol). Pinch one end and leave the other side blunt and glue to the longer piece using sugar glue.
Step 4. Now that your stars and eyelashes are in drying mode, time to get the rainbow hair together. I didn't use tylose powder here but I did prep the hair and let it set overnight. For the hair, roll out your fondant into a thick rope. Next cut the rope between 4-6" or so. Mark lines on the piece from end to end with a skewer (or toothpick). Roll the piece on one end and give the other side a nice curve. I used an 8" syrofoam cake to set up all the hair pieces and let them dry overnight.

Step 5. Now back to the gray stars! When your stars are nice and firm, cut out some fresh gray fondant rounds and use these softer rounds, along with sugar glue to sandwich the white paper cover wire between them and the star shape. See the images below. Let these star dry and secure before adding the glitter.
Step 6. Now it's time to make **glittery** magic! First I painted both the stars and the unicorn horn with silver dust. However, it was after that that I thought... you know... glittery dust will look so much better and *magical* lol! So I painted both the stars and the horn with sugar glue and dusted away! Btw, I am so excited to get these onto our online shop, and as soon as I do I will get them posted!


Here is my daughter Alison reveling in the magical-ness of the glittery horn:-D, love her excitement!!
Step 7. Make matching unicorn ears in a leaf-sort of shape. I used teardrop cutters but you can eyeball this or cut a template no prob! Also sandwich these wires inbetween as well using sugar glue.
Step 8. Now it's time to put it all together:). I've always worried about how fondant will stick to buttercream, and, turns out it's not too bad. I like to make sure the buttercream is a little extra cold and in the process of coming to room temperature it get's a little wet and sticky which let's the fondant naturally stick to it (whew!). Of course, buttercream doesn't allow much room for do-overs...another reason fondant is my fave. But it's ok, dealing with it haha. At this point you can add the eyelashes, place the hair, insert the horn, ears and the stars. SOOO much fun this cake was:). I also added a little glittery cheek star next to the left-est lash

And here she is. So posh even when her stars are flipped backward lol!
Happy cake making!!


Comments
Post a Comment