
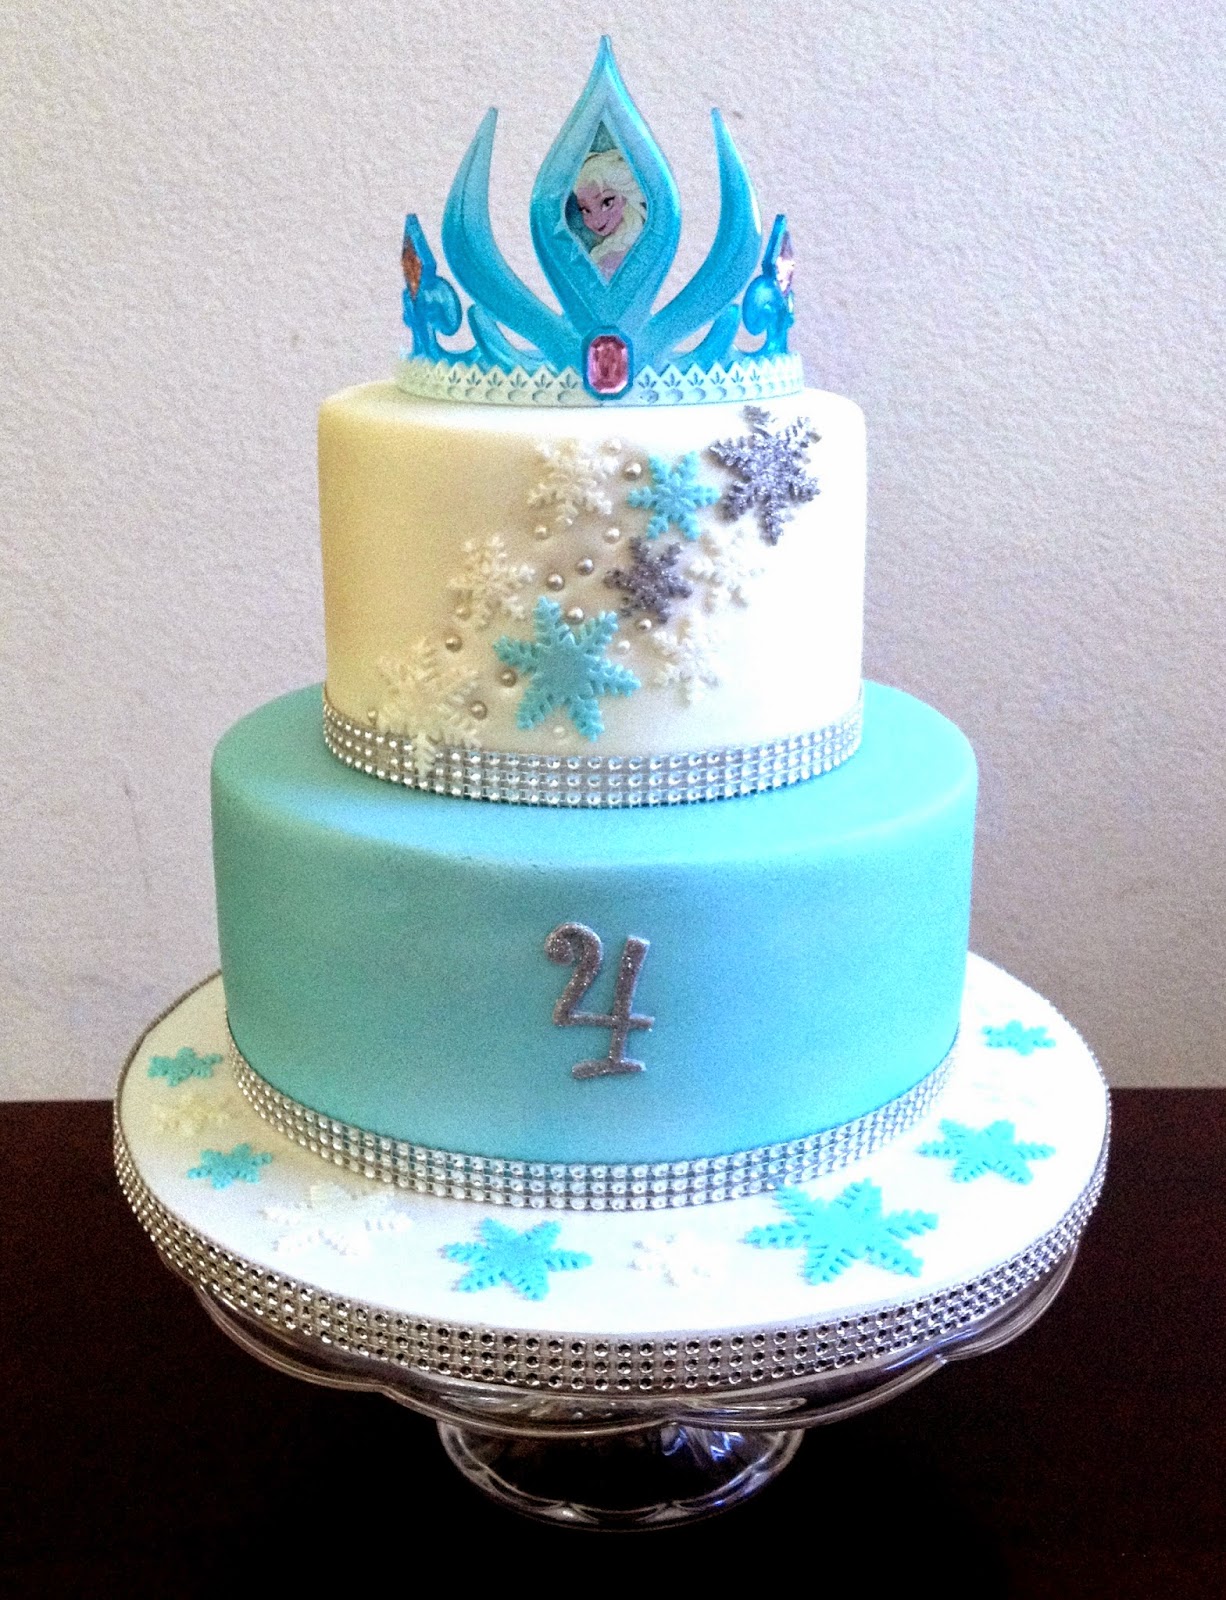
Elsa Crown Cake
This tutorial is all about how to get the silver shimmery look on the snowflakes and little number.
However, as a side note to get the whole cake to shimmer (I know it really doesn't show but if you look at the pix below you can see that the cake kind of has a glow to it) you will want to airbrush it. Crazy how different cakes look in really life and how difficult it is to really capture that in a pix. There is just something about the texture that is not too easily captured.
So, how to get the whole cake to glow? Airbrush with pearl shimmer! Make sure to apply ALL of the details (except the crown!:)) first and airbrush everything before doing the silver sparkly steps.
Also here is our descriptive tutorial on our YouTube channel.
Make sure to subscribe to our channel get all of our video tutorials!
AND to never miss a tutorial enter your email at the above right!

Sparkly Snowflakes
Materials
* Snowflake cutters (available online)
* Shortening
* Disco Dust in American Silver (made by CK products and available at Every Baking Moment or online)
* Silver Highlighter Dust (or anything else silver looking)
* Vodka (no is is not to drink while you are working!)
* Small brushes for each item

Steps
1. Place all the details on your cake (snowflakes & number) [if you want to airbrush your cake with pearl shimmer make sure that this step is done and color is dried before continuing]
2. Put a very small amount of silver dust in a small container and a small amount of Vodka (we're talking drops here!). Mix to create a paint. Using a brush paint your desired details with silver and let dry.
3. Next, paint your snowflakes with a good coat of shortening. This will act like your sticking agent.
4. Just dab (really try not to actually brush here or it will get everywhere!) your Disco Dust on the snowflakes and number on top of your shortening coat. You will see that it will stick very easily!!
Happy Caking!!
Christie


Beautiful cake! What size cake pans did you use?
ReplyDeleteHello! Sorry I just noticed your comment! I used 6" and 9" pans:)
Delete